Short discussion about experience with setting up Ubiquiti Gateway Fiber in combination with Proximus Business Giga Fiber 2.5 Gbps (Symmetric). This is Part-1 in (hopefully) a series of posts discussing my ‘homelab’/home network.
Context
After reading up on the updates Proximus has made to their network regarding how many VLANS they use for delivering internet, TV & VoIP to customers [1], I was tempted to upgrade to said service to consolidate the network (later more).
This modification has not been made recently but has matured over time. The only requirement for the incoming line only consisting of one VLAN is the service has to be a fiber connection and must use the new Internet Box(+) [2].

Depending on which subscription you either get a Internet Box or Internet Box+ (2.5Gbps+) [3].
Original Connection
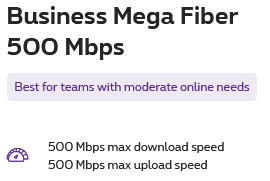
The upgrade to a fiber service connection was finally done in the summer of 2025, after initially receiving a notice letter in February 2021. The original service consisted of the middle tier fiber subscription you could get: Business Mega Fiber 500 Mbps (Symmetric).
Upgraded Connection
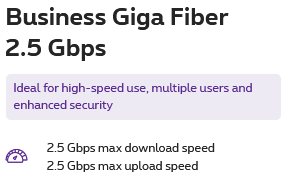
The upgraded service is a 2.5 Gbps Symmetric connection included in the Business Giga Fiber pack. The requirement for enabling such speeds, is the Internet Box+ (also supported for the highest service connection). This is the successor to the Bbox V3(+) modem/router model.
Gateway fiber
The main device powering the connection and serving as the router is the Unifi Gateway Fiber [4]. It is currently the cheapest 10GB supported router/firewall which the IPS/IDS speed required if PPPoE hardware offloading is needed. The original service connection of the Bbox V3(+) used PPPoE to connect a router after the modem. Since the upgrade to the higher fiber tier, this has been replaced with putting said Internet Box(+) into bridge mode (more details later).
The Gateway fiber replaced an old 1U enterprise server which ran Pfsense. The device had become to load & power hungry since it consisted of old Xeon CPU’s. I originally bought the device 5 to 6 yeas ago second hand. Including the service live of the device, it was time to upgrade. I taught about putting OpenSense on it, since it probably had the compute power to route at 10 Gbps using, but decided for the one management interface since I already have quite a bit of Unifi gear in the network.
Service Upgrade
With a service upgrade schedule, the technician arrived, changed the existing ONT over to a beefier Huawei Based ONT and the new Internet Box 7 +. The configuration of the service itself went very smoothly on there end, but I noticed that took a bit longer for configuration to apply on the modem than expected.
After having said configuration take effect, the internet (+ Wifi) appeared to work. Initially I had some issue with getting my connection working, since I had to put a specific port in ‘Bridge Mode’ as Telenet has done for some time now. Since, I did not really how this would work and if bridge mode was actually needed, I waited a bit for checking the online configuration portal on MyProximus.
Issues
The first attempts at configuring the Internet Box+ through the MyProximus did not succeed and prompted with error messages. After contacting the technical service desk, they acknowledge the issue and also noted that they also could not see the configuration/settings they needed.
After ‘rebooting’ the device twice during the call, they asked to be able to disconnect the call and figure out the issue on their end. Not later than 40+ mins, they tried to call back but I missed it. A technician than did come out to check the service and the MyProximus configuration page was available to setup.
While the service is very clean and allows for configuring & monitoring everything you could potentially want (thanks!), I am bit disappointed with the change from a local setup (<= Bbox V3(+)) to a Cloud only configuration interface.
Bridge Mode Connection
With the configuration interface available, the modem could be put into ‘Bridge Mode’. The Bridge mode is restricted to one interface (clearly labeled on the device & interface) by supplying the MAC address of the third party device/interface connected to interface. The third party device as discussed earlier is the Gateway Fiber.
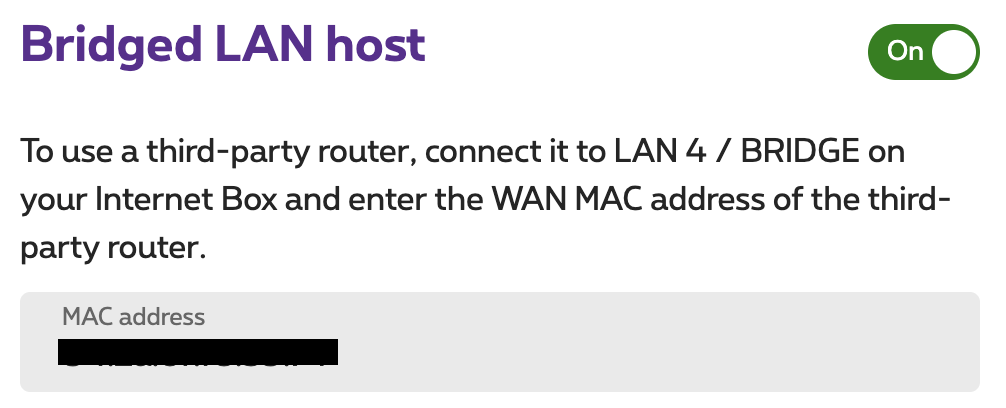
It took some time getting the correct MAC address, which later appeared to be a modem issue, I had to first disable the Bridge mode again & reset the modem. With the modem reset, wait for the third party device connected to LAN/Bridge port to appear in the configuration interface. Copy the MAC address of the interface, enable ‘Bridge Mode’ and after a few minutes the Gateway Fiber received an external IP. The above trick of copying the MAC address from the configuration was found in a userbase.be thread.

Conclusion
A more comprehensive review of the Gateway Fiber if needed will be made at some later point, so far the device has performed as advertised and reviewed by others. The connection speeds have also been as advertised.
In the next post ‘Part-2’, I will discuss temporarily directly connecting my desktop to the 10GB port of the Gateway Fiber.